If you’re learning How to Fit a Kitchen, you’re not alone. Most people feel nervous because kitchens look expensive and unforgiving. One wrong cut can feel like the end of the world. The good news is you can get a clean result with calm planning.
This How to Fit a Kitchen guide keeps things simple. You’ll work in the right order. You’ll measure properly. You’ll fit the unit level. Then you’ll finish neatly. That’s the real secret behind a pro-looking kitchen.
By the end, you’ll understand how to fit a kitchen without the stress. You’ll know what tools matter. You’ll spot problems early. You’ll avoid the classic mistakes that waste time and money. Let’s get your kitchen looking sharp and feeling solid.
How to Fit a Kitchen: Tools and Materials You Will Need
A smooth job starts before you lift a single cabinet. A proper kitchen installation guide begins with the right kit, because rushing back and forth to the hardware shop kills your momentum. For DIY kitchen fitting, you want tools that help you stay accurate and consistent. A tape measure matters, but accuracy comes from kitchen measuring and marking done slowly and clearly. Keep a pencil, a straight edge, and masking tape for marking lines on walls and floors without leaving a mess.
You’ll also need power tools, but you don’t need a workshop. A drill driver is essential because you’ll drill pilot holes often, especially when you install kitchen cabinets and join units together. A decent bit set saves you from stripped screws. Add clamps because you’ll clamp cabinets together to keep faces flush before you fix them. For levelling, don’t try to “eyeball it”. Always use a spirit level. When people ask why their doors never sit right, it’s often because they didn’t level kitchen units at the start.
Fixings matter just as much as tools. In many UK homes you’ll use wall plugs and screws into masonry. In many US homes you’ll fix units to wall studs. Either way, match the fixing to the wall. If you guess, the wall will win. Keep packers or shims ready too. They help you fine-tune height and get better kitchen cabinet alignment. For worktops, you’ll want a straight cutting guide and the right saw. When it’s time to cut and fit worktops, control is everything. That’s why many people prefer to cut the worktop with a circular saw using a guide rail. It feels slower, but it saves the surface from chipping.
Here’s a quick table that keeps your setup sensible for both UK and US readers.
| What you need | Why it matters | Where it gets used |
| Spirit level | Stops wonky runs | level kitchen units, fit kitchen wall units |
| Drill + bits | Clean fixing without splits | drill pilot holes, cabinet joining |
| Clamps | Keeps faces flush | clamp cabinets together |
| Fixings | Safe load-bearing support | use wall plugs and screws, fix units to wall studs |
| Saw + guide | Straight, tidy cuts | kitchen worktop fitting, cut worktop with a circular saw |
| Silicone + sealant | Prevents water damage | kitchen sealing and finishing, sink edges |
How to Fit a Kitchen: Measuring and Planning the Layout Correctly
If you want How to Fit a Kitchen to feel easy, treat planning like insurance. It costs a little time now and saves you pain later. Start by taking proper measurements. Don’t just guess. Measure kitchen space wall to wall, then floor to ceiling, then corner to corner. Next, check if the walls are straight. Many aren’t. A slight bow can turn a neat run into visible gaps, especially near tall panels. This is where smart kitchen layout planning pays off, because you can decide where to hide the awkward bits.
Now do a step that sounds boring but changes everything. Find the highest floor point. Floors often dip, especially in older UK terraces and many US timber-frame houses. That high point becomes your reference for every base unit. If you ignore it, you’ll chase problems for days. Once you know it, you can mark level lines around the room. Use your level and take your time. When people mess up How to Fit a Kitchen, they usually rush this stage.
Next, set out kitchen units on paper before you start. Think in real-life movement, not just pretty pictures. Can drawers open fully? Will the dishwasher door clash with a handle? Can you stand at the sink without banging your knees? This is also when you plan kitchen corner unit fitting. Corners look simple until you realise doors collide or storage becomes useless. A common win is to give corners breathing space with the right unit choice and sensible fillers.
A simple example helps. Imagine you place the washing machine right next to the oven. It fits on paper. In real life, the heat and moisture mix badly and you lose counter space where you need it most. Smart kitchen layout planning avoids that. Keep messy tasks near the sink. Keep hot tasks near the hob. Keep the fridge close enough that you don’t jog across the room for milk.
How to Fit a Kitchen: Preparing Walls, Floors, and Plumbing First
This stage is what makes How to Fit a Kitchen feel “stress-free” instead of chaotic. Strip the old kitchen carefully. Turn off power where needed and isolate water. Then check the basics. Are the walls sound? Is the floor stable? If you spot damp patches, crumbly plaster, or soft boards, fix them now. You’re building a heavy, precise system. Weak surfaces turn into movement, then movement turns into misaligned doors.
Now focus on kitchen plumbing preparation. Map the pipe runs and decide where services should sit so your new units don’t block access. You’ll later connect water supply valves and connect waste traps, so plan for space behind units and inside sink cabinets. If you’re moving the sink, plan it before you fit cabinets. It’s much easier to adjust pipes when the room is open.
Next comes kitchen electrical preparation. This is where UK and US homes differ, but the principle stays the same. Plan sockets for real use, not just looks. You’ll want power for the kettle, toaster, microwave, fridge, and maybe under-cabinet lighting. In many UK setups, kitchen electrics tie into regulations that require competent work. In many US setups, kitchens often need dedicated circuits and protected outlets. Either way, keep it safe and get qualified help when the job crosses the line.
A small case study shows why prep matters. A homeowner in Leeds fitted units first, then realised the waste pipe sat exactly where the back of the sink cabinet needed to sit. They cut a huge notch, weakened the cabinet, and the doors never lined up again. Another homeowner in Ohio planned services first, left proper clearance, and later fitted the sink in one afternoon. Same effort, totally different outcome.
How to Fit a Kitchen: Installing Base Units the Right Way
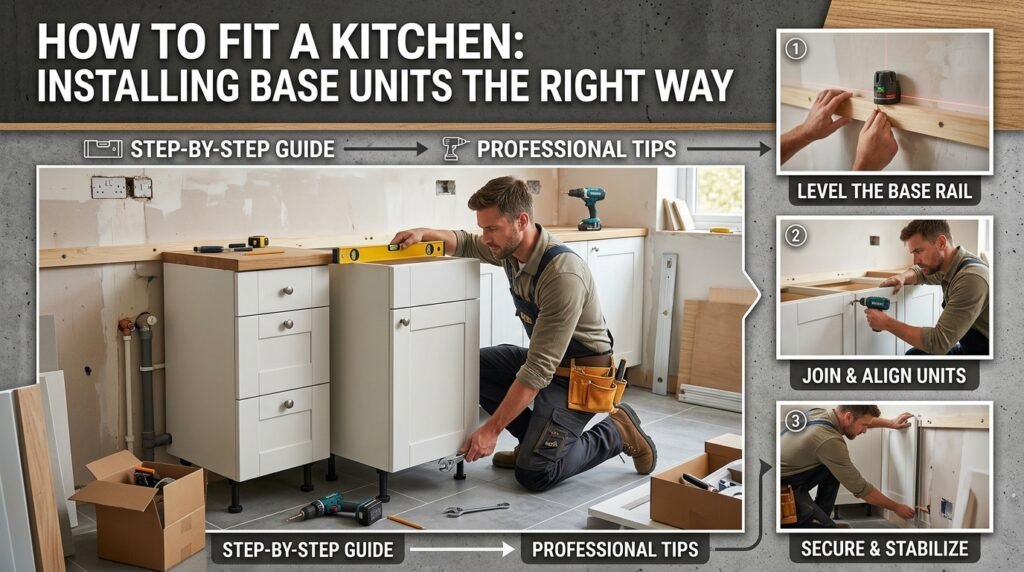
This is the point where How to Fit a Kitchen becomes real. Start with the bases because everything sits on them. Always install base cabinets first. If you start with wall units, you’ll still need to reference base height later and you’ll risk awkward gaps. Begin at the high point you found earlier. Set the first cabinet height carefully and then work outward. Use packers so the cabinet sits firm. No wobble. If it rocks, fix it now.
As you go, keep checking your line. You want clean kitchen cabinet alignment across the run. A neat trick is to line up cabinet fronts with a straight edge, then tighten fixings after you confirm the faces sit flush. You’ll also need to drill pilot holes before driving screws, especially when you join units. When you join two cabinets, clamp cabinets together first. That keeps the faces flush while you fix them. It’s the difference between “close enough” and “that looks professional”.
When it’s time to fix units back, match the wall type. If you’re in a US stud wall, fix units to wall studs because that gives strong support. If you’re in UK masonry, use wall plugs and screws correctly. Don’t rely on thin plaster alone. Once fixed, check again and level kitchen units across the whole run.Think of it like building a straight railway line. If the first section goes off, every carriage later wobbles.
This is also where you plan for finishing pieces later. Leave room for kitchen plinth installation, filler strips, and service gaps. Make sure appliance spaces match the real appliance sizes, not what you “think” they are. This small discipline makes kitchen appliance installation far less painful.
How to Fit a Kitchen: Fitting Wall Cabinets Safely and Level
Wall cabinets look light, but they can be dangerous if you rush them. When you tackle How to Fit a Kitchen properly, you treat wall units like heavy loads hanging above your head. Start by marking the height. Use your earlier mark level lines as a reference. Then double-check that the line makes sense for you. A kitchen should suit your daily habits, not a generic diagram.
To fit them safely, use proper fixings. In many US homes, you’ll fix units to wall studs. In many UK homes, you’ll use wall plugs and screws in masonry, or specialist fixings in plasterboard. Once the first unit goes up, check it carefully. Use a spirit level on the cabinet and on the run. Don’t assume the ceiling line is straight. It often isn’t.
Walls are rarely perfect, so you may need to scribe panels to uneven walls. It sounds fancy, but it’s just trimming a panel so it follows the wall’s shape. That’s how you avoid ugly gaps. After the boxes sit right, move to the front. This is where a kitchen starts to look finished. Take time to fit cabinet doors evenly. Then adjust hinges until gaps look consistent. For drawers, fit drawer runners precisely. If the runner sits even slightly off, drawers scrape and feel cheap.
A simple example helps here. If a drawer feels stiff, don’t blame the drawer. Check the runner alignment. People often “force it” and strip screws. A calmer fix is to loosen, align, then retighten. That’s the vibe you want throughout How to Fit a Kitchen.
How to Fit a Kitchen: Cutting and Installing Worktops for a Neat Finish
Worktops make or break the look. You can fit lovely units, but a rough cut screams DIY from across the room. For kitchen worktop fitting, slow is smooth and smooth is fast. Start by measuring the run again. Confirm walls, corners, and appliance gaps. Then plan your cut lines. This is one place where it’s worth doing a “dry fit” first.
When you cut and fit worktops, support the material properly. If it flexes, it chips. If it chips, it looks rough. Many DIYers choose to cut the worktop with a circular saw because it gives straighter results with a guide. It also reduces that shaky “freehand” feeling. Once you cut, test the piece before you fix it down. Then, when you join sections, join worktops with bolts so the seam pulls tight. A clean join is about pressure and alignment, not brute force.
Next, protect the vulnerable edges. Always seal worktop edges, especially around sinks and dishwashers. Water finds tiny gaps and turns them into swelling, stains, and regret. After that, move to the sink. Mark carefully, then fit the sink cut-out with patience. You’ll thank yourself later. Once the sink drops in, you can fit the kitchen sink and tap. Then connect services. You’ll connect water supply valves and connect waste traps and check for leaks. Finally, seal around the sink with silicone in a neat, continuous bead. Don’t smear it everywhere. Clean lines look professional.
Here’s a quick comparison table that helps UK and US readers choose a sensible worktop approach.
| Worktop type | DIY friendliness | Key risk | Best tip |
| Laminate | High | Edge swelling | seal worktop edges every time |
| Solid wood | Medium | Movement over time | Leave expansion space and seal well |
| Stone/quartz | Low | Heavy and brittle | Get pro cuts and fitting where possible |
How to Fit a Kitchen: Final Checks, Sealing, and Finishing Touches
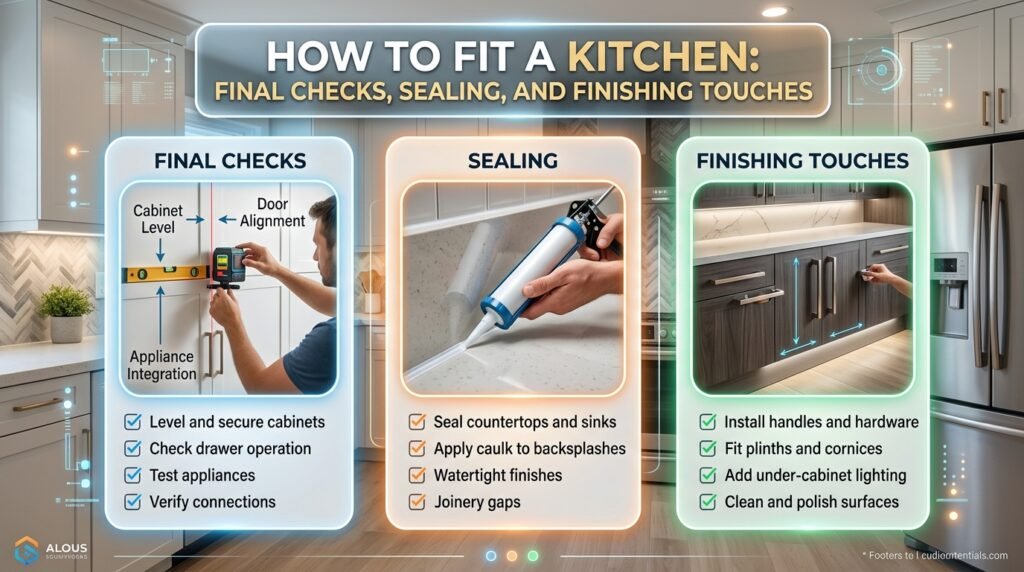
This stage is where How to Fit a Kitchen turns from “installed” into “polished”. Start low. Do kitchen plinth installation to hide legs and tidy the base line. Many systems use clips, so install plinth clips carefully and keep the plinth straight. Then complete kitchen kickboard fitting so the whole run looks intentional rather than pieced together.
Next, handle side panels and trims. Kitchen end panels fitting hides raw cabinet edges and makes the kitchen look built in. Where needed, add end panels and cover strips to close gaps and protect edges. Up top, you may choose kitchen cornice and pelmet fitting for a more finished look, especially in traditional styles. Even in modern kitchens, a neat top line can make cabinets feel more premium.
Now finish appliances. Kitchen appliance installation goes smoother when you planned gaps earlier. Take your time to align appliances with door lines and handle positions. If you’re using integrated models, fit integrated appliances carefully so doors sit flush and open cleanly. This is one of the first things guests notice, even if they can’t explain why.
Finally, do kitchen sealing and finishing with a practical mindset. Any joint that meets water needs sealing. Any edge that catches grime needs a clean line. After everything sets, re-check doors and drawers. Hinges settle. Floors shift slightly. That’s normal. Do a final round of tweaks and enjoy the result.
Before you celebrate, watch for common kitchen fitting mistakes. People often forget the high floor point, rush measurements, or skip proper fixings. Others cut worktops too early, then realise the wall isn’t square. Some also ignore service access, then struggle later when something leaks. A calm, step-by-step approach avoids all of that and keeps How to Fit a Kitchen feeling doable.
FAQs
Which tools are essential to start the job?
You’ll need a drill, clamps, and a level. How to Fit a Kitchen gets easier with the right tools ready.
How do I know my units will sit straight?
Find the highest floor point first. Then How to Fit a Kitchen properly by levelling every base unit carefully.
Should I fit base units or wall units first?
Always start with base units. How to Fit a Kitchen feels smoother when the bottom run is solid and level.
Can I cut the worktop myself without ruining it?
Yes, if you measure twice and cut slowly. How to Fit a Kitchen looks pro with clean worktop edges.
Do I need to move plumbing before fitting units?
If pipes clash with cabinets, move them first. How to Fit a Kitchen works best with planned plumbing positions.
How do I stop the sink area from leaking later?
Seal the sink edge neatly with silicone. How to Fit a Kitchen lasts longer when water can’t seep inside.
What’s the biggest mistake beginners make?
They rush measurements and skip leveling. How to Fit a Kitchen stays stress-free when you plan and check often.
Conclusion
Once you understand How to Fit a Kitchen, the job stops feeling mysterious. You measure well. You plan your layout. You prep the room properly. Then you install units in a clean order.
The big win in How to Fit a Kitchen is staying level and consistent. Start from the highest floor point. Keep checking lines. Fix cabinets securely. Seal every wet area. Small steps add up fast. If you follow this How to Fit a Kitchen approach, you’ll get a kitchen that feels solid and looks sharp. You’ll avoid the common traps that waste weekends. You’ll also feel proud every time you make tea or cook dinner. That’s the real pro finish.
Small restroom design ideas to make tiny spaces stylish, functional, and inviting. Transform compact bathrooms with smart layouts and modern touches.